Sewing has been an essential craft for centuries, yet many of the most effective techniques remain hidden from the modern world. Whether you’re a beginner or an expert seamstress, knowing a few ancient sewing secrets can make your work easier, neater, and more durable. Let’s uncover these time-tested tricks that can change the way you sew forever.
The Lost Art of Traditional Sewing Techniques
Sewing is more than just stitching fabric together—it’s an art form that requires precision and patience. Over generations, tailors and seamstresses have developed techniques to make their work more efficient. Unfortunately, many of these methods have been forgotten in the age of fast fashion. Here are some of the best-kept sewing secrets that will enhance your craftsmanship.
1. Strengthen Your Thread with Beeswax
Have you ever had your thread tangle or break while sewing? That’s because raw thread lacks the strength and smoothness needed for seamless stitching. This is where beeswax comes in—a natural way to fortify your thread.
How to Use Beeswax on Thread:
 Take a small piece of beeswax (available at craft stores or from natural sources). Run your thread through the wax, coating it lightly. Use a warm iron or your fingers to set the wax into the thread, ensuring smoothness.
By waxing your thread, you prevent knots, reduce fraying, and make hand-stitching smoother. This method has been used by tailors for centuries, and it’s still one of the best ways to extend the life of your stitches.
2. Mark Fabrics with Dry Soap for Easy Removal
Fabric markers and chalk can sometimes leave stains or require special erasers, but there’s an easier solution—dry soap. If you’ve never tried this trick before, you’re missing out on one of the simplest, most effective ways to mark fabric.
Why Use Dry Soap Instead of Chalk?
It glides smoothly on fabric, leaving a visible mark. It washes away completely without leaving a trace. It’s eco-friendly and doesn’t create dust like chalk.
Simply take an old, dry bar of white soap, sharpen the edges (like a piece of chalk), and use it to mark where you need to cut or stitch. Once your sewing is complete, the soap will dissolve when the fabric is washed—no mess, no stains!
3. The Magic of the Loop Knot Technique
Sick of knots coming undone while sewing? Instead of the usual single or double knots, try the loop knot technique to secure your stitches firmly.
How to Tie a Loop Knot for Sewing:
- Thread your needle and pull the thread through.
- Create a small loop at the end of the thread.
- Pass the needle through the loop and pull tight.
This method keeps your stitches secure without causing bulk or weakening the fabric, making it perfect for delicate materials.
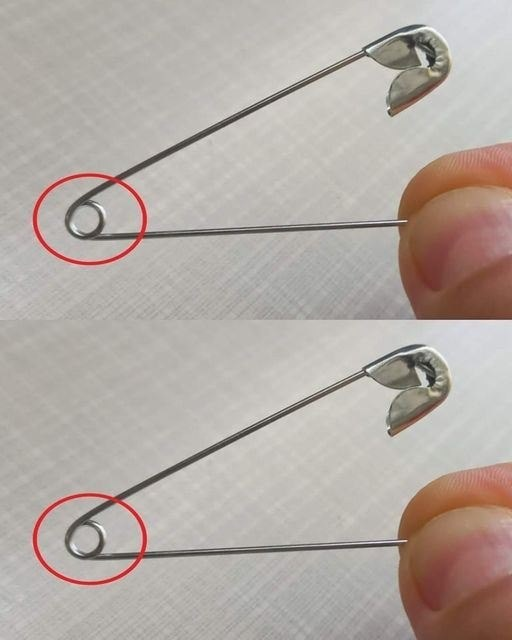
4. Use a Safety Pin to Thread Elastic or Drawstrings
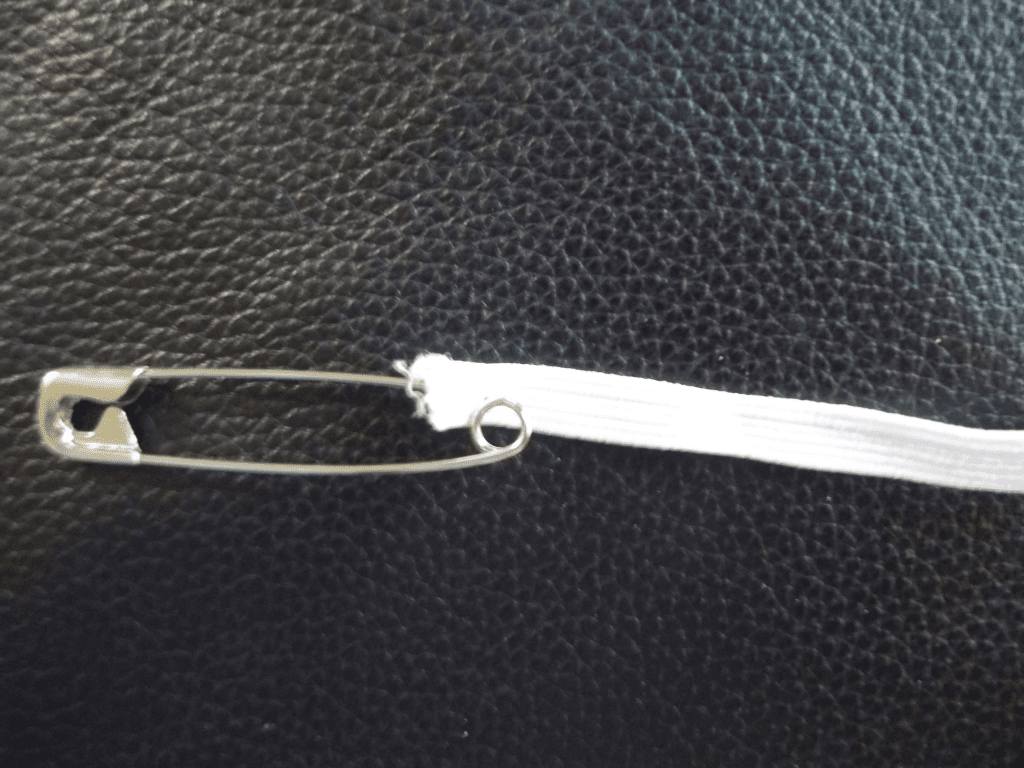
Have you ever struggled to thread elastic through a waistband or a drawstring through a hoodie? Instead of fumbling with your fingers, use a safety pin—a simple yet powerful sewing hack.
How to Thread Elastic with a Safety Pin:
Attach a safety pin to one end of the elastic or string. Insert the pin into the casing and push it through, guiding it with your fingers. Once it reaches the other end, pull it out and adjust the elastic.
This old-school trick saves time and frustration, making sewing tasks more manageable.
5. Prevent Frayed Edges with a Simple Hand-Sewn Finish
Fabric edges often fray, leading to unraveling seams and a messy appearance. While overlock machines (sergers) can prevent fraying, they aren’t always accessible. The whipstitch method is a great alternative for hand-sewers.
How to Do a Whipstitch for Fray Prevention:
Thread a needle with strong thread. Loop the thread around the fabric edge, sewing closely together. Ensure even spacing for a clean, durable finish.
This technique has been used for centuries, especially in historical garment-making, and remains one of the best ways to keep fabric edges neat and long-lasting.
6. The Basting Stitch: Your Secret to Perfect Seams

Many beginners skip basting stitches because they see them as unnecessary, but professionals know they are a game-changer.
What is a Basting Stitch?
A long, temporary stitch that holds fabric layers together before final sewing. It helps ensure alignment and precision before committing to permanent stitching.
Use long, loose stitches with a contrasting thread. Check the fit or design before securing the final seam. Once satisfied, sew the permanent stitches and remove the basting thread.
This method prevents mistakes and gives a more polished, professional finish to your sewing projects.
Bringing Back Time-Tested Sewing Techniques
Sewing may seem simple, but these ancient techniques show that a little extra effort can make a big difference. Whether you’re working on a new garment, a repair, or a creative project, these tricks will elevate your skills and make your work more durable and precise.
So, why not give these methods a try? By incorporating beeswax for thread strength, dry soap for marking, loop knots for security, safety pins for threading, whipstitching for fray control, and basting for precision, you’ll be stitching like a pro in no time.
Conclusion: A Stitch in Time Saves Nine
The beauty of sewing lies in mastering the little tricks that make each stitch stronger and each project more seamless. These ancient sewing secrets have stood the test of time for a reason—they work. So next time you pick up a needle and thread, remember that the simplest solutions are often the most effective.
Ready to take your sewing skills to the next level? Try these techniques, and see the difference for yourself!
Eldery Lady Forbids Anyone to Touch Old Trinket Box until Day She Dies — Story of the Day
Catherine Davis never let anyone have access to her old trinket box. But when her neighbor Lucy opened it after her death, she was taken aback by what was inside.
Catherine Davis was 90 years old, lonely, and had spent almost her entire life in poverty. Her only helping hands in old age had been her neighbor Lucy, who helped her around the house and looked after her, and Lucy’s children, who often referred to her as Grandma and spent time with her.
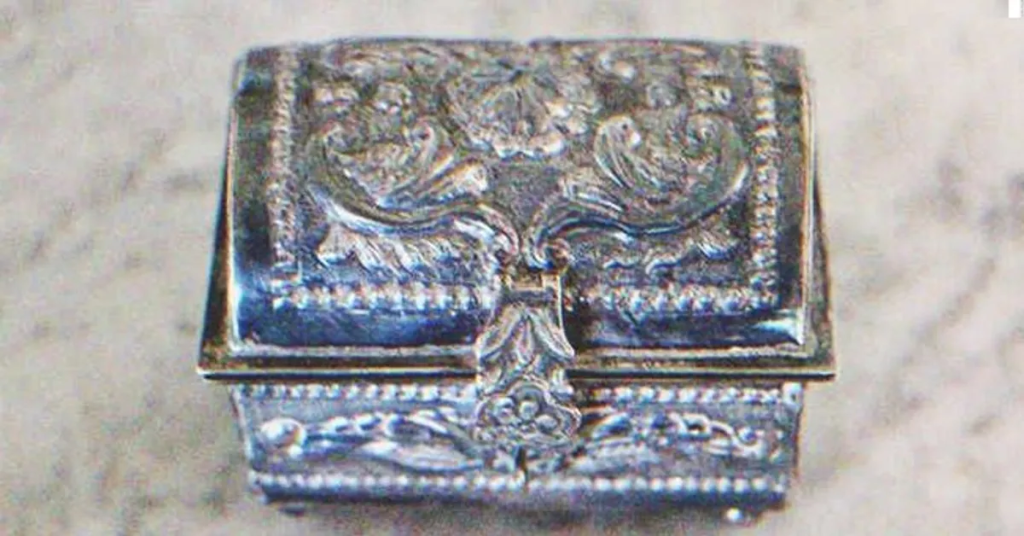
One day, when Lucy was cleaning Catherine’s room, she noticed a beautiful trinket box on a shelf. The woman brought it down and began inspecting it out of curiosity, but Catherine saw her. “Lucy!” she yelled, screaming at the top of her lungs. “Since when did you start touching my things without permission?”

For illustration purposes only | Source: Pexels
“There’s nothing like that, ma’am,” Lucy explained. “The box was covered in dust, so I just decided to clean it. By the way, where did you get this from? It’s quite pretty.”
Catherine stepped forward and snatched the box from her grasp. “That is none of your concern, young lady. Anyway, I believe you have completed your cleaning for the day. You should leave right now.”
“But I was just…” Before Lucy could say anything, Catherine cut her off. “Please leave now!”
What does that box even hold? I’ve never seen her get so possessive over anything, Lucy pondered, looking into Catherine’s eyes, which appeared more worried and sad than upset.
“Do I need to repeat myself? Please leave!” Catherine screamed again.
“Oh no, I’m sorry for troubling you,” Lucy said as she hurriedly packed all her belongings and left.
That night at home, whenever Lucy tried to sleep, her thoughts kept returning to the old box. It appeared old but it had a lovely silver shine and an intricate pattern engraved on it. Was it given to Catherine by someone she cared about deeply? But if that’s the case, why would she keep it hidden? She’s told me everything about her life, hasn’t she? she wondered.
The following day, when Lucy visited Catherine, she decided to apologize to her. The woman reasoned that it had to be something personal to Catherine and that she shouldn’t have touched it without her permission. But Catherine didn’t open the door.

For illustration purposes only | Source: Pexels
“Are you there, ma’am?” Lucy called out. “It’s me, Lucy.” No replies came. Worried, Lucy dashed to the backyard to see if Catherine was there, but it was deserted as if no one had ever lived there.
Although Catherine never left her home without informing Lucy, she thought maybe after what happened the day before, Catherine was upset with her and went out alone. But when she called Catherine’s phone, the ringing was coming from inside the house. At this point, Lucy was worried, so she called the cops.
As soon as they arrived, they broke down the door, and there was Catherine, unconscious. The cops summoned an ambulance, and she was taken to the hospital.
When Lucy paid a visit to Catherine in the hospital, the elderly lady couldn’t stop thanking her. “Thank you so much, Lucy! I wouldn’t be alive today if you didn’t arrive on time. Sorry for being rude yesterday.”
“Oh, no, that’s fine,” Lucy replied. “You should rest right now. We can talk about all of that later. You look quite weak.”
“Ah, honey, I don’t think I will make it out of here this time,” the old lady moaned. “In case something happens to me, I want you to have everything I own, including the old vintage trinket box. However, please open it after my death. I’m embarrassed by what I’ve done. The key can be found in the table cabinet. Consider it my final wish.”
“You shouldn’t say such stuff! You’re not going anywhere, understand?” Lucy started crying. But the next day, the old lady’s words proved true, and she left for her heavenly abode.
For illustration purposes only | Source: Shutterstock
Lucy organized her funeral, and after everyone had gone, the first thing she remembered was the box Catherine had left her. She dashed over to the shelf, grabbed it, and slid onto the bed. When she finally opened it, she was taken aback by what she found inside.
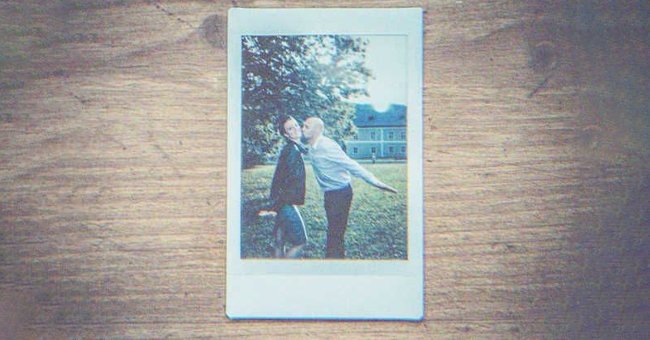
There was a vintage flute, silvery in color and as lovely as the box that housed it. Then there was an old dairy with a photograph of a young couple in it. After a closer look, she recognized the young woman was Catherine Davis. She had been quite happy and pretty in those days, unlike her old age when her face was riddled with dark circles and sunken cheeks.
But who is this young man? Was Catherine married? The woman wondered and began reading the diary. That’s when she realized why the old lady never let anyone touch it.
It turns out Catherine had fallen in love with a poor talented musician and wanted to marry him sooner, but the man insisted on marrying only after establishing himself because he wanted a comfortable life for his future family. Meanwhile, Catherine’s parents arranged for her to marry a wealthy man.
She was initially hesitant to accept the arranged marriage. But then, she saw the opportunity as retaliation for her lover’s refusal to marry her and agreed to the wedding despite the young musician’s pleadings.
However, when she received the silver flute as a wedding gift from her love, along with a note about how much he missed her, she fled and returned to him. But then another tragedy struck her, and she learned he’d died in a car accident.

For illustration purposes only | Source: Shutterstock
Catherine was heartbroken, and when she returned home, her parents refused to accept her. So she spent some time with her grandparents, and when they died, she worked part-time jobs until her old age, when she had to rely on her savings to survive.
As Lucy turned the last page of the diary, she found a note addressed to her. “Thank you for looking after me, Lucy,” it said. “And please accept my apologies if I was impolite. All the while, I kept a diary of my entire life because I couldn’t get over my first love, and whenever I read about him, I’m happy that, even though I was late, I chose him over someone else.
“But you know, this diary is quite full of tragic memories, and I didn’t want to mention you here because, unlike what I faced in the past, I have been happy since I met you. So I decided to write down my thoughts in this note today. Thank you for loving and caring for me. I’m glad I met you. With love, Catherine Davis.”
Lucy’s eyes welled up as she finished reading the diary. The older woman’s flute was worth thousands of dollars, but she preferred to remain impoverished rather than sell it for a better life because it was a reminder of her ex-lover.
Catherine, I will not let your sacrifice go to waste! Lucy vowed to herself. And the next day, the woman decided to donate the flute to the museum of arts, which now houses the flute and a stone engraved with Catherine’s love story.

For illustration purposes only | Source: Shutterstock
What can we learn from this story?
- Life is entirely unexpected. Catherine’s tragic love story is a brilliant example of this.
- Learn to be kind and helpful, the way Lucy helped Catherine.
If you enjoyed this story, you might like this one about a little boy who pays for a starving old lady’s groceries and asks her to make a wish.
This account is inspired by our reader’s story and written by a professional writer. Any resemblance to actual names or locations is purely coincidental. All images are for illustration purposes only. Share your story with us; maybe it will change someone’s life.


Leave a Reply